1 Swift 3.0
优化了许多API,简化了接口,去掉了不必要的单词等,比如下面这几个例子:
a
1
2
3
4
//before
override func numberOfSectionsInTableView(tableView: UITableView) -> Int
//now
override func numberOfSections(in tableView: UITableView) -> Int
b
1
2
3
4
//before
NSTimer.scheduledTimerWithTimeInterval(0.35, target: self, selector: #selector(reset), userInfo: nil, repeats: true)
//now
Timer.scheduledTimer(timeInterval: 0.35, target: self, selector: #selector(reset), userInfo: nil, repeats: true)
c
1
2
3
4
//before
let blue = UIColor.blueColor()
//now
let blue = UIColor.blue
d
1
2
3
4
//before
UIDevice.currentDevice()
//now
UIDevice.current
2 SiriKit
通过官方文档我们可以看到SiriKit框架支持的六类服务分别是:
- 语音和视频通话
- 发送消息
- 收款或者付款
- 图片搜索
- 管理锻炼
- 行程预约
3 iMessage Apps
iMessage App是一种全新的应用扩展,载体是iOS系统的Message应用,通过iMessage App,用户可以发送更加丰富的消息内容,享受更具交互性的会话体验。我们来看看它都有什么新鲜玩意:
新增三种类型
- Stickers
- Interactive Messages
- 可以发送图片,音视频,文本,链接等等
Messages App Store
- 显示iMessage App;
- 为未安装应用的用户提供安装途径(Inline App Attribution);
- 提供iap,Apple Pay和访问相机功能。
4 语音识别
苹果官方在文档中新增了API Speech,那么在以前我们处理语音识别非常的繁琐甚至很多时候可能需要借助于第三方框架处理,那么苹果推出了这个后,我们以后处理起来就非常的方便了。
speech具有以下特点:
可以实现连续的语音识别
可以对语 音文件或者语音流进行识别
最佳化自由格式的听写(可理解为多语言支持)和搜索式的字符串
核心代码:
1
2
3
4
5
6
7
8
9
10
11
12
13
14
15
16
17
18
19
20
21
22
23
#import <Speech/Speech.h>
//1.创建本地化标识符
NSLocale *local =[[NSLocale alloc] initWithLocaleIdentifier:@"zh_CN"];
//2.创建一个语音识别对象
SFSpeechRecognizer *sf =[[SFSpeechRecognizer alloc] initWithLocale:local];

//3.将bundle 中的资源文件加载出来返回一个url

NSURL *url =[[NSBundle mainBundle] URLForResource:@"XXX.mp3" withExtension:nil];
//4.将资源包中获取的url 传递给 request 对象
SFSpeechURLRecognitionRequest *res =[[SFSpeechURLRecognitionRequest alloc] initWithURL:url];

//5.发送一个请求
[sf recognitionTaskWithRequest:res resultHandler:^(SFSpeechRecognitionResult * _Nullable result, NSError * _Nullable error) {
    if (error!=nil) {
        NSLog(@"语音识别解析失败,%@",error);
    }
    else
    {
        //解析正确
        NSLog(@"---%@",result.bestTranscription.formattedString);
    }
}];
另外,语音识别需要真机测试(硬件的支持),还需要访问权限。
5 UITabBarController 中的改进
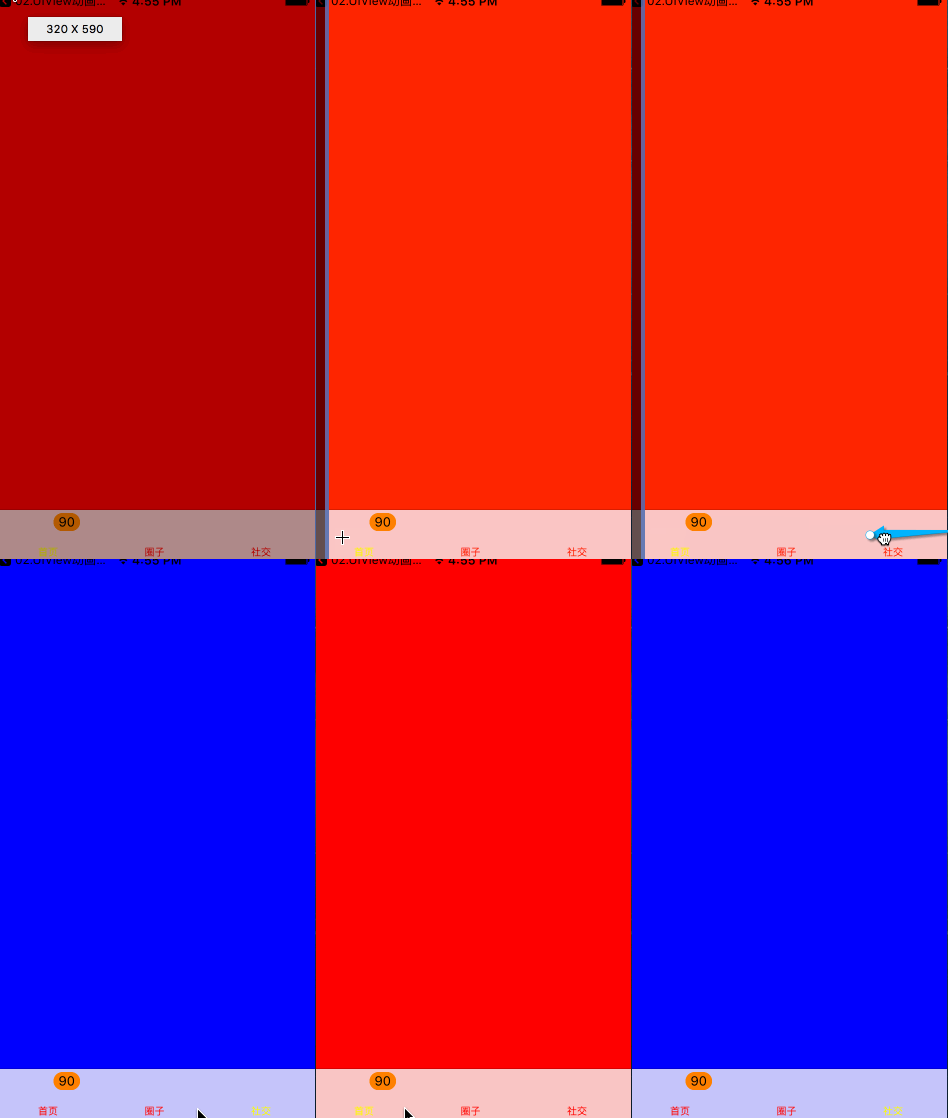
在iOS 10之前,tabBarItem上的文字颜色,默认是蓝色,上面的新消息提醒数字badge 默认是红色的,未选中的TabBarItem的文字颜色默认是黑色的,我们修改的话,也只能修改它的默认颜色 ,其它的就不能进行个性化定制,使用起来非常的不方便,iOS10之后我们可以轻松个性化定制了。
核心代码:
1
2
3
4
5
6
7
8
9
10
11
12
13
14
15
16
17
18
19
20
21
22
23
24
25
26
27
28
29
30
31
32
33
34
35
36
37
38
39
40
41
42
43
44
45
46
47
48
49
50
51
52
53
54
55
//1.创建出三个UIViewcontroller 对象

OneViewController *oneVc =[[OneViewController alloc] init];
//2.设置每一个控制器上的tabbar
oneVc.view.backgroundColor =[UIColor redColor];
//设置标题
oneVc.tabBarItem.title = @"首页";

TwoViewController *twovC =[[TwoViewController alloc] init];
twovC.view.backgroundColor =[UIColor purpleColor];


//设置标题
twovC.tabBarItem.title = @"圈子";
ThreeViewController *threVC =[[ThreeViewController alloc] init];
threVC.view.backgroundColor =[UIColor blueColor];

//设置标题
threVC.tabBarItem.title = @"社交";


//2.将创建好的三个普通控制器加入到tabbarController 控制器中

[self addChildViewController:oneVc];

[self addChildViewController:twovC];
[self addChildViewController:threVC];


//改变tabbar 上面的文字默认颜色

oneVc.tabBarController.tabBar.tintColor =[UIColor yellowColor];

twovC.tabBarController.tabBar.tintColor =[UIColor yellowColor];

threVC.tabBarController.tabBar.tintColor =[UIColor yellowColor];


//使用iOS 10新推出的 修改 tabbar 未选中的tintColor 颜色

//这一句代码将 tabbar 未选中的时候的默认色- 黑色改为红色

oneVc.tabBarController.tabBar.unselectedItemTintColor =[UIColor redColor];


//tabbarItem 中属性

//数字提醒的颜色  在iOS 10之前的版本默认都是数字提醒都是红色
oneVc.tabBarItem.badgeColor =[UIColor orangeColor];
oneVc.tabBarItem.badgeValue =@"90";

//将tabBarItem 中数字提醒默认的白色改掉  使用富文本修改
[oneVc.tabBarItem setBadgeTextAttributes:@{
                                           NSForegroundColorAttributeName:[UIColor blackColor]
                                           } forState:UIControlStateNormal];
效果图:
6 iOS10.0中字体跟随系统设置变化大小
在以前如果说我们想改变APP中程序的字体大小,我们只能自定义字体或者使用runtime进行处理,或者都得设置UIFont,非常的不妨百年,从iOS 10苹果官方允许我们自定义设置。
核心代码:
1
2
3
4
5
6
7
8
9
10
11
12
13
14
15
/*
 在iOS 10当中,当咱们用户将手机的字体大小进行了设置调整之后,那么app中设置相关代码字体也会跟着一起变化 ,支持常见一些字体UI控件 比如uilabel uibutton
 */
[super viewDidLoad];

//设置字体的改变大小
self.labels.font =[UIFont preferredFontForTextStyle:UIFontTextStyleBody];
//允许改变

/*
 苹果官方明确的告诉你必须和  preferredFontForTextStyle 或者preferredFontForTextStyle:(NSString *)style compatibleWithTraitCollection 进行结合使用
 注意这里不支持模拟器操作
 **/

self.labels.adjustsFontForContentSizeCategory = YES;
7 UIViewPropertyAnimator属性动画器
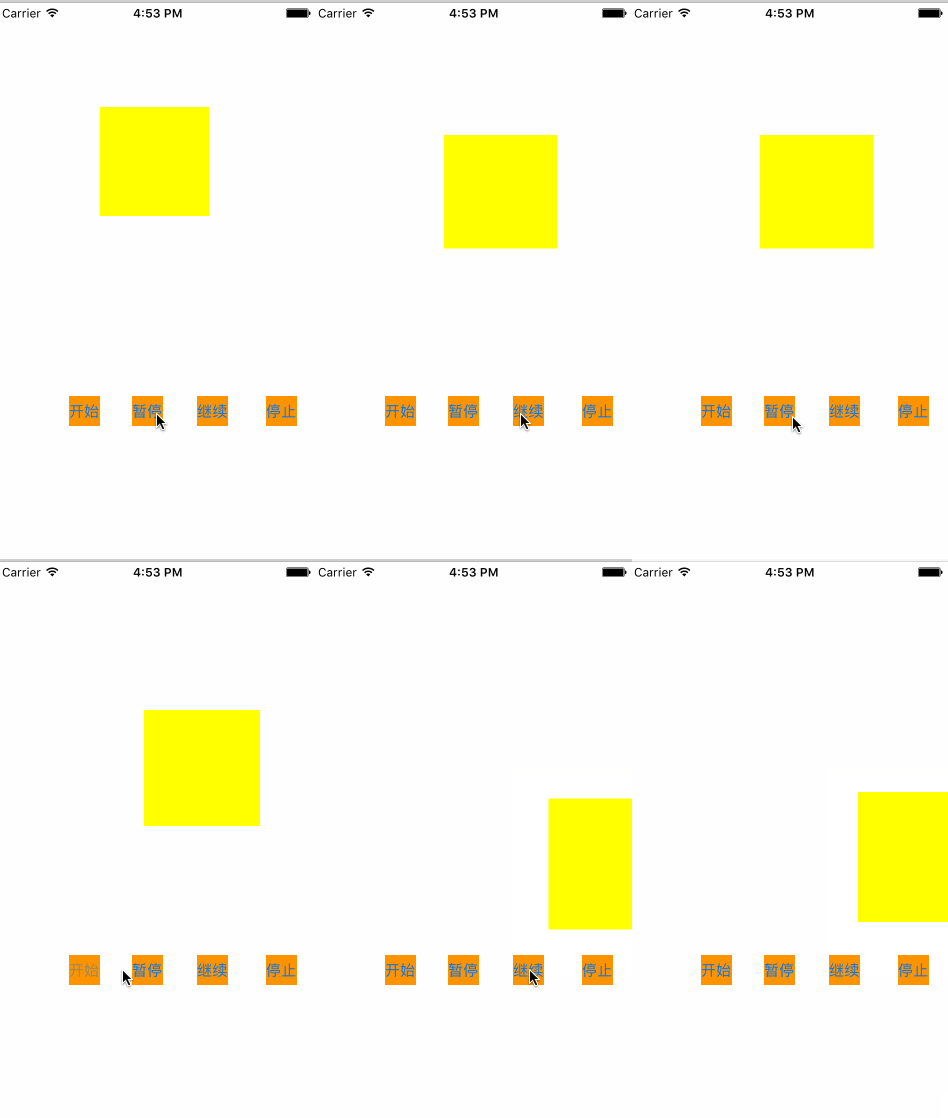
那么在iOS 10之前,我们使用UIView 做动画效果或者自定义一些layer 的动画,如果开始了,一般无法进行停止操作更不能暂停操作,而且一些非常复杂的动画处理也比较麻烦,但是在iOS10,苹果推出了一个全新的API UIViewPropertyAnimator,可供我们处理动画操作。
UIViewPropertyAnimator 是 iOS 10 中新增的一个执行 View 动画的类,具有以下特点:
可中断性
可擦除
可反转性
丰富的动画时间控制功能
核心代码:
1
2
3
4
5
6
7
8
9
10
11
12
13
14
15
16
17
18
19
20
21
22
23
24
25
26
27
28
29
30
31
32
33
34
35
36
37
38
39
40
41
42
43
44
45
46
47
48
49
50
51
52
53
54
55
56
57
58
59
60
61
62
63
#import "ViewController.h"
@interface ViewController ()
@property(nonatomic,strong)UIView *myView;
@property(nonatomic,strong)UIViewPropertyAnimator *myViewPro;
@end
@implementation ViewController
- (void)viewDidLoad {
    [super viewDidLoad];

    //1.创建一个View对象
    UIView *Views =[[UIView alloc] initWithFrame:CGRectMake(50, 50, 100, 100)];
    Views.backgroundColor =[UIColor yellowColor];
    [self.view addSubview:Views];
    //2.创建一个外部的变量进行引用

    self.myView = Views;


    //3.创建一个view 动画器
    UIViewPropertyAnimator *viewPro  =[UIViewPropertyAnimator runningPropertyAnimatorWithDuration:1.0 delay:30.0 options:UIViewAnimationOptionCurveLinear animations:^{
        //使用View动画器修改View的frame
        self.myView.frame = CGRectMake(230, 230, 130, 130);
    } completion:nil];

    self.myViewPro = viewPro;
}
//结束
- (IBAction)stop:(id)sender {

    // YES 和NO 适用于设置当前这个属性动画器是否可以继续使用
    [self.myViewPro stopAnimation:YES];
}
//继续
- (IBAction)continued:(id)sender {


    //UITimingCurveProvider
    /**
    @property(nullable, nonatomic, readonly) UICubicTimingParameters *cubicTimingParameters;
    @property(nullable, nonatomic, readonly) UISpringTimingParameters *springTimingParameters;

     **/
    //设置弹簧效果 DampingRatio取值范围是 0-1

    //这个取值 决定弹簧抖动效果 的大小 ,越往  0 靠近那么就越明显
    UISpringTimingParameters *sp =[[UISpringTimingParameters alloc] initWithDampingRatio:0.01];

    //设置一个动画的效果
//    UICubicTimingParameters *cub =[[UICubicTimingParameters alloc] initWithAnimationCurve:UIViewAnimationCurveEaseInOut];

     //durationFactor  给一个默认值 1就可以
    [self.myViewPro continueAnimationWithTimingParameters:sp durationFactor:1.0];
}
//暂停
- (IBAction)puase:(id)sender {

    [self.myViewPro pauseAnimation];
}
//开始
- (IBAction)start:(id)sender {

    [self.myViewPro startAnimation];
}
效果图:
8 UIApplication对象中openUrl被废弃
在iOS 10.0以前的年代,我们要想使用应用程序去打开一个网页或者进行跳转,直接使用[[UIApplication sharedApplication] openURL 方法就可以了,但是在iOS 10 已经被废弃了,因为使用这种方式,处理的结果我们不能拦截到也不能获取到,对于开发是非常不利的,在iOS 10全新推出了 [[UIApplication sharedApplication] openURL:nil options:nil completionHandler:nil];有一个成功的回调block 可以进行监听。
核心代码:
1
2
3
[[UIApplication sharedApplication] openURL:nil options:nil completionHandler:^(BOOL success) {

}];
9 CallKit
继2014年苹果推出VoIP证书后,这次VoIP 接口的开放,以及一个全新的 App Extension,简直是VOIP的福音,可见苹果对VOIP的重视。callkit框架 VoIP应用程序集成与iPhone的用户界面,给用户一个很棒的经历。用这个框架来让用户查看和接听电话的锁屏和VoIP管理联系人电话在手机APP的收藏夹和历史的观点。
CallKit还介绍了应用程序的扩展,使呼叫阻塞和来电识别。您可以创建一个应用程序扩展,可以将一个电话号码与一个名称联系起来,或者告诉系统当一个号码应该被阻止。
10 第三方键盘的改进
非常非常重要,第三方键盘一直都不能很方便的拥有长按地球键的功能,现在有了。通过 handleInputModeListFromView:withEvent: 可以弹出系统键盘列表。同时使用 documentInputMode 可以检测输入上下文中的语言,你可以对输入方式进行一些类似于对齐方式的调整。
11 Xcode7 和 Xcode 8 项目中的xib兼容问题
在Xcode8上打开项目要小心,尤其是对于xib过程,在变动后可不要随意点保存,否则当你回头用Xcode7打开时时发现报错了,Xcode保存的xib在xcode7上是识别不了的!
12 ApplePlay
可用于 SFSafariViewController
可用于没有UI的extensions中
在 iMessage 应用中也支持 ApplePay

