我们经常使用美团外卖、饿了么、口碑等外卖软件点餐,几乎所有的外卖软件所展示的商品类别都无一例外,采用双列表的形式呈现商品。
我们拿美团外卖为例,截图如下:
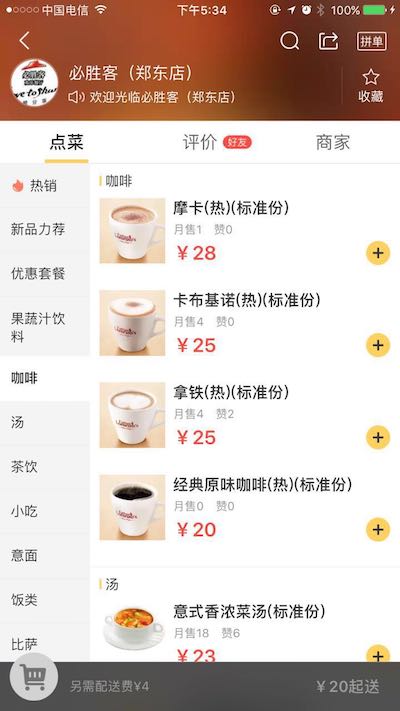
暂时忽略头部视图,只关注下面的商品分组列表。
思路:
在开始之前,我们首先应该思考其实现的流程和可能遇到的问题!首先映入眼帘的是左侧的商品分类列表,以及右侧的分区展现的商品列表。所以:
- 我们至少需要两个tableView,单纯的放上两个tableView还不能满足实际需求。
- 拿美团外卖这个界面来看,点击左侧商品分类,右侧的商品列表会将该分类的分区第一条数据滚动至右侧tableView的顶部。用户滚动右侧列表,左侧分类列表会随之高亮显示相应的分类标签。可以通过UITableViewDelegate的协议,即分区头、脚视图的显示周期,以及UIScrollViewDelegate的相应协议来实现左侧和右侧列表的联动。并结合tableView的滚动方法实现双列表的联动效果。
- ```objectivec //分区头视图将要显示
- (void)tableView:(UITableView *)tableView willDisplayHeaderView:(UIView *)view forSection:(NSInteger)section //分区脚视图已经结束显示
- (void)tableView:(UITableView *)tableView didEndDisplayingFooterView:(UIView *)view forSection:(NSInteger)section //以及结束减速
- (void)scrollViewDidEndDragging:(UIScrollView *)scrollView willDecelerate:(BOOL)decelerate; ```
1
2
//滚动至某一行
- (void)scrollToRowAtIndexPath:(NSIndexPath *)indexPath atScrollPosition:(UITableViewScrollPosition)scrollPosition animated:(BOOL)animated;
实践:
1、创建两个tableView:
- 为了尽可能简单实现,我们采用StoryBoard来创建这两个tableView(当然你也可以使用代码来创建),左侧tableView宽度为固定宽度100,右侧tableView宽度为剩余屏幕宽度,这里采用自动布局技术约束(这里不再赘述其实现过程)。如下图所示:
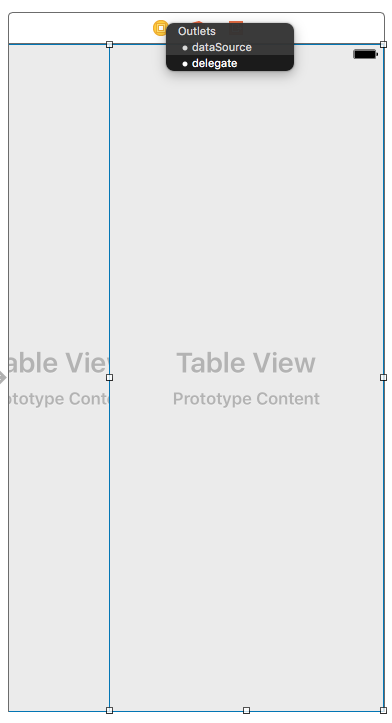
两个tableView布局、delegate的连接 及 关联代码
2、模拟分类的商品数据
1
2
3
4
5
6
7
8
9
10
11
12
13
14
15
16
17
18
19
20
21
22
23
24
25
26
27
28
29
30
31
32
33
34
35
36
_relate = YES;
goodsList = @[
                      @{@"title" : @"精选特卖",
                        @"list" : @[@"甜点组合", @"毛肚", @"菌汤", @"甜点组合", @"毛肚", @"菌汤",@"甜点组合", @"毛肚", @"菌汤"]
                        },
                      @{@"title" : @"饭后(含有茶点)",
                        @"list" : @[@"甜点组合", @"毛肚", @"菌汤"]
                        },
                      @{@"title" : @"茶点(含有茶点)",
                        @"list" : @[@"甜点组合", @"毛肚", @"菌汤",@"甜点组合", @"毛肚", @"菌汤"]
                        },
                      @{@"title" : @"素材水果拼盘",
                        @"list" : @[@"甜点组合", @"毛肚", @"菌汤",@"甜点组合", @"毛肚", @"菌汤",@"甜点组合", @"毛肚", @"菌汤",@"甜点组合", @"毛肚", @"菌汤",]
                        },
                      @{@"title" : @"水果拼盘生鲜果",
                        @"list" : @[@"甜点组合", @"毛肚", @"菌汤",]
                        },
                      @{@"title" : @"拼盘",
                        @"list" : @[@"甜点组合"]
                        },
                      @{@"title" : @"烤鱼盘",
                        @"list" : @[@"甜点组合", @"毛肚", @"菌汤",@"甜点组合", @"毛肚", @"菌汤"]
                        },
                      @{@"title" : @"饮料",
                        @"list": @[@"甜点组合", @"毛肚", @"菌汤",@"甜点组合", @"毛肚", @"菌汤",@"甜点组合", @"毛肚", @"菌汤",@"甜点组合", @"毛肚", @"菌汤"]
                        },
                      @{@"title": @"小吃",
                        @"list": @[@"甜点组合", @"毛肚"]
                        },
                      @{@"title" : @"作料",
                        @"list" : @[@"甜点组合", @"毛肚", @"菌汤"]
                        },
                      @{@"title" : @"主食",
                        @"list" : @[@"甜点组合", @"毛肚", @"菌汤"]
                        },
                      ];
3、绘制两tableView
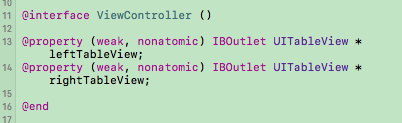
- 首先别忘了让ViewController遵守tableView的delegate:

- 分区数、行数的实现:
1
2
3
4
5
6
7
8
9
10
11
12
13
14
15
//分区数
- (NSInteger)numberOfSectionsInTableView:(UITableView *)tableView{
    if (tableView==_leftTableView) {
        return 1;
    }
    return goodsList.count;
}

//行数
- (NSInteger)tableView:(UITableView *)tableView numberOfRowsInSection:(NSInteger)section{
    if (tableView==_leftTableView) {
        return goodsList.count;
    }
    return [[goodsList[section] objectForKey:@"list"] count];
}
- 单元格内容的实现,这里只使用系统简单的cell风格,左侧cell高度默认80,右侧默认100,如下图所示:
1
2
3
4
5
6
7
8
9
10
11
12
13
14
15
16
17
18
19
20
21
22
23
//单元格内容
- (UITableViewCell *)tableView:(UITableView *)tableView cellForRowAtIndexPath:(NSIndexPath *)indexPath{
    UITableViewCell * cell = [tableView dequeueReusableCellWithIdentifier:@"cell"];
    if (cell==nil) {
        cell = [[UITableViewCell alloc]initWithStyle:UITableViewCellStyleDefault reuseIdentifier:@"cell"];
    }
    if (tableView==_leftTableView) {
        //分类标题
        cell.textLabel.text = [goodsList[indexPath.row] objectForKey:@"title"];
    }else{
        //商品标题
        cell.textLabel.text = [[goodsList[indexPath.section] objectForKey:@"list"] objectAtIndex:indexPath.row];
    }
    return cell;
}

//行高
- (CGFloat)tableView:(UITableView *)tableView heightForRowAtIndexPath:(NSIndexPath *)indexPath{
    if (tableView==_leftTableView) {
        return 80;
    }
    return 100;
}
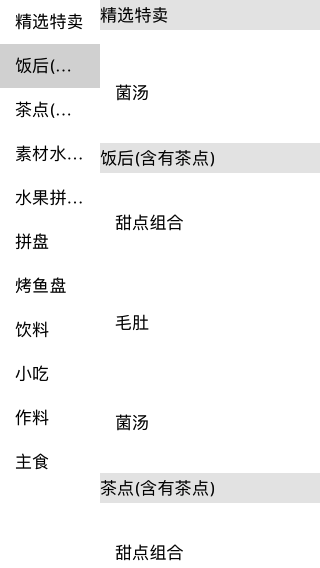
测试运行工程可以看到一个简单的双列表已经呈现在你的面前,如下图所示:

- 绘制分区头视图,高度设置为30:
1
2
3
4
5
6
7
8
9
10
11
12
13
14
15
16
17
18
19
20
21
22
23
24
25
26
27
28
29
30
31
//分区头视图
- (UIView *)tableView:(UITableView *)tableView viewForHeaderInSection:(NSInteger)section{
    if (tableView==_rightTableView) {
        UIView * view = [[UIView alloc] initWithFrame:CGRectMake(0, 0, _rightTableView.bounds.size.width, 30)];
        view.backgroundColor = [UIColor colorWithWhite:0.9 alpha:0.9];
        UILabel * label = [[UILabel alloc] initWithFrame:view.bounds];
        [view addSubview:label];
        label.text = [goodsList[section] objectForKey:@"title"];
        return view;
    }
    return nil;
}

//分区头视图高度
- (CGFloat)tableView:(UITableView *)tableView heightForHeaderInSection:(NSInteger)section{
    if (tableView==_leftTableView) {
        return CGFLOAT_MIN;
    }
    return 30;
}

//脚视图高度
- (CGFloat)tableView:(UITableView *)tableView heightForFooterInSection:(NSInteger)section{
    if (tableView == self.leftTableView) {
        return 0;
    } else {
        //重要
        return CGFLOAT_MIN;
    }
}
至此,两个tableView的绘制完成了,接下来解决联动的问题吧。
4、两个tableView的联动
首先定义一个BOOL类型的变量_relate 来标记左侧列表是否滚动,在viewDidLoad和下面的代理中把_relate置为YES:
1
2
3
4
5
6
#pragma mark - UIScrollViewDelegate
//已经结束减速
- (void)scrollViewDidEndDragging:(UIScrollView *)scrollView willDecelerate:(BOOL)decelerate {
    _relate = YES;
}
- 实现点击左侧单元格,右侧列表自动滚动到相应分区
1
2
3
4
5
6
7
8
9
10
11
12
13
- (void)tableView:(UITableView *)tableView didSelectRowAtIndexPath:(NSIndexPath *)indexPath {
    if (tableView == _leftTableView) {
        _relate = NO;
        //选择该行,并自动滚动至列表中心区域
        [self.leftTableView selectRowAtIndexPath:indexPath animated:NO scrollPosition:UITableViewScrollPositionMiddle];
        //右侧滚动至相应分区
        [self.rightTableView scrollToRowAtIndexPath:[NSIndexPath indexPathForItem:0 inSection:indexPath.row] atScrollPosition:UITableViewScrollPositionTop animated:YES];
    }else {
        //取消选中
        [self.rightTableView deselectRowAtIndexPath:indexPath animated:NO];

    }
}
- 实现滚动右侧列表,左侧列表自动选中相应分区标题
1
2
3
4
5
6
7
8
9
10
11
12
13
14
15
16
17
18
19
20
21
22
23
//分区头即将显示
- (void)tableView:(UITableView *)tableView willDisplayHeaderView:(UIView *)view forSection:(NSInteger)section {
    if (_relate) {
        //获取显示在最顶部的cell的分区数
        NSInteger topCellSection = [[[tableView indexPathsForVisibleRows] firstObject] section];
        if (tableView == self.rightTableView) {
            //滚动该分区对应的标题至列表靠近中部区域
            [self.leftTableView selectRowAtIndexPath:[NSIndexPath indexPathForItem:topCellSection inSection:0] animated:YES scrollPosition:UITableViewScrollPositionMiddle];
        }
    }
}

//分区头已经结束显示
- (void)tableView:(UITableView *)tableView didEndDisplayingFooterView:(UIView *)view forSection:(NSInteger)section {
    if (_relate) {
        //获取显示在最顶部的cell的分区数
        NSInteger topCellSection = [[[tableView indexPathsForVisibleRows] firstObject] section];
        if (tableView == self.rightTableView) {
            //滚动该分区对应的标题至列表靠近中部区域
            [self.leftTableView selectRowAtIndexPath:[NSIndexPath indexPathForItem:topCellSection inSection:0] animated:YES scrollPosition:UITableViewScrollPositionMiddle];
        }
    }
}
至此一个简单实用的经典双列表联动效果已经实现了!
Demo地址:
优化:
####
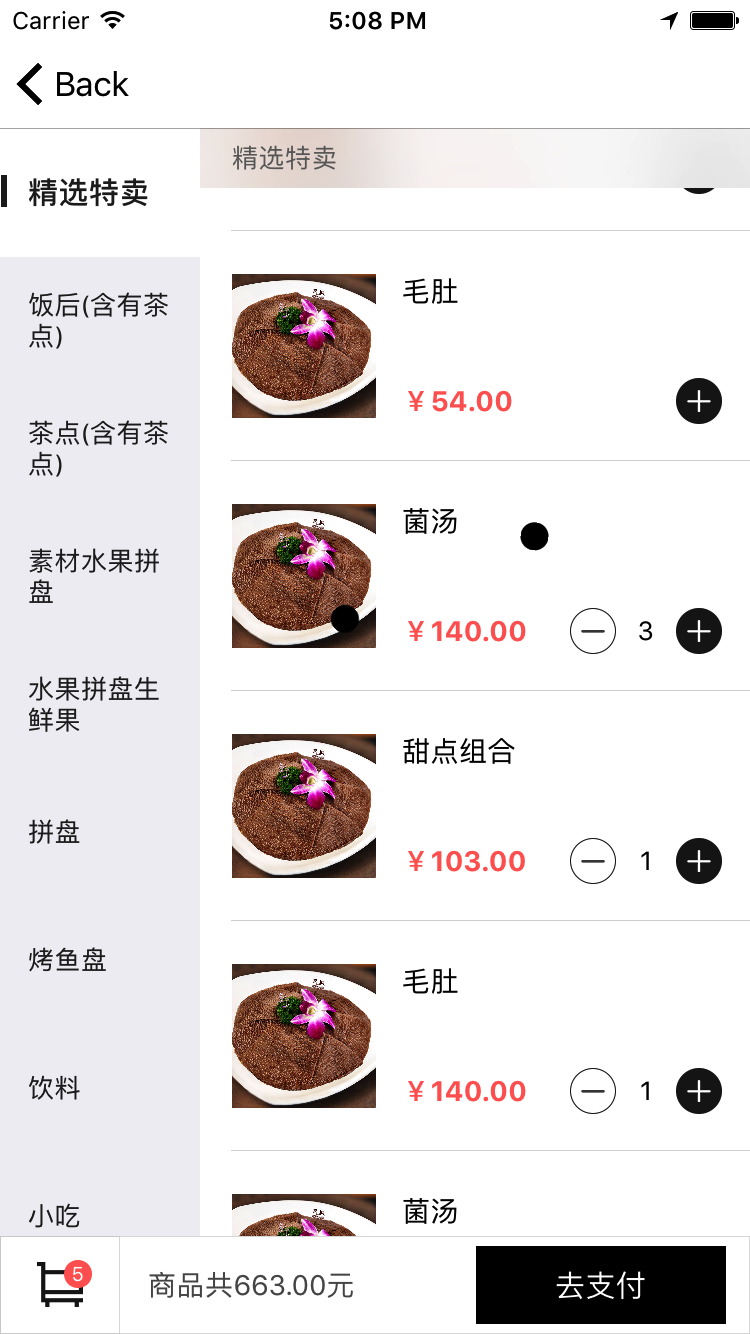
另外,我对其做了进一步的扩展优化,如加入购物车的动画,导航渐变等,效果图如下所示:
项目地址: